TnE 1424
 兌換碼
兌換碼
 追蹤
追蹤
 地圖
地圖
 切薩雷
切薩雷
 維京人
維京人
 秘境
秘境
 遺跡與要塞
遺跡與要塞
 時程
時程
 禮包計算機
禮包計算機
 Discord
Player Info
Loading player info...
TnE地圖
⚠️ 請勿隨意移動位置(Please DO NOT take other's spot)
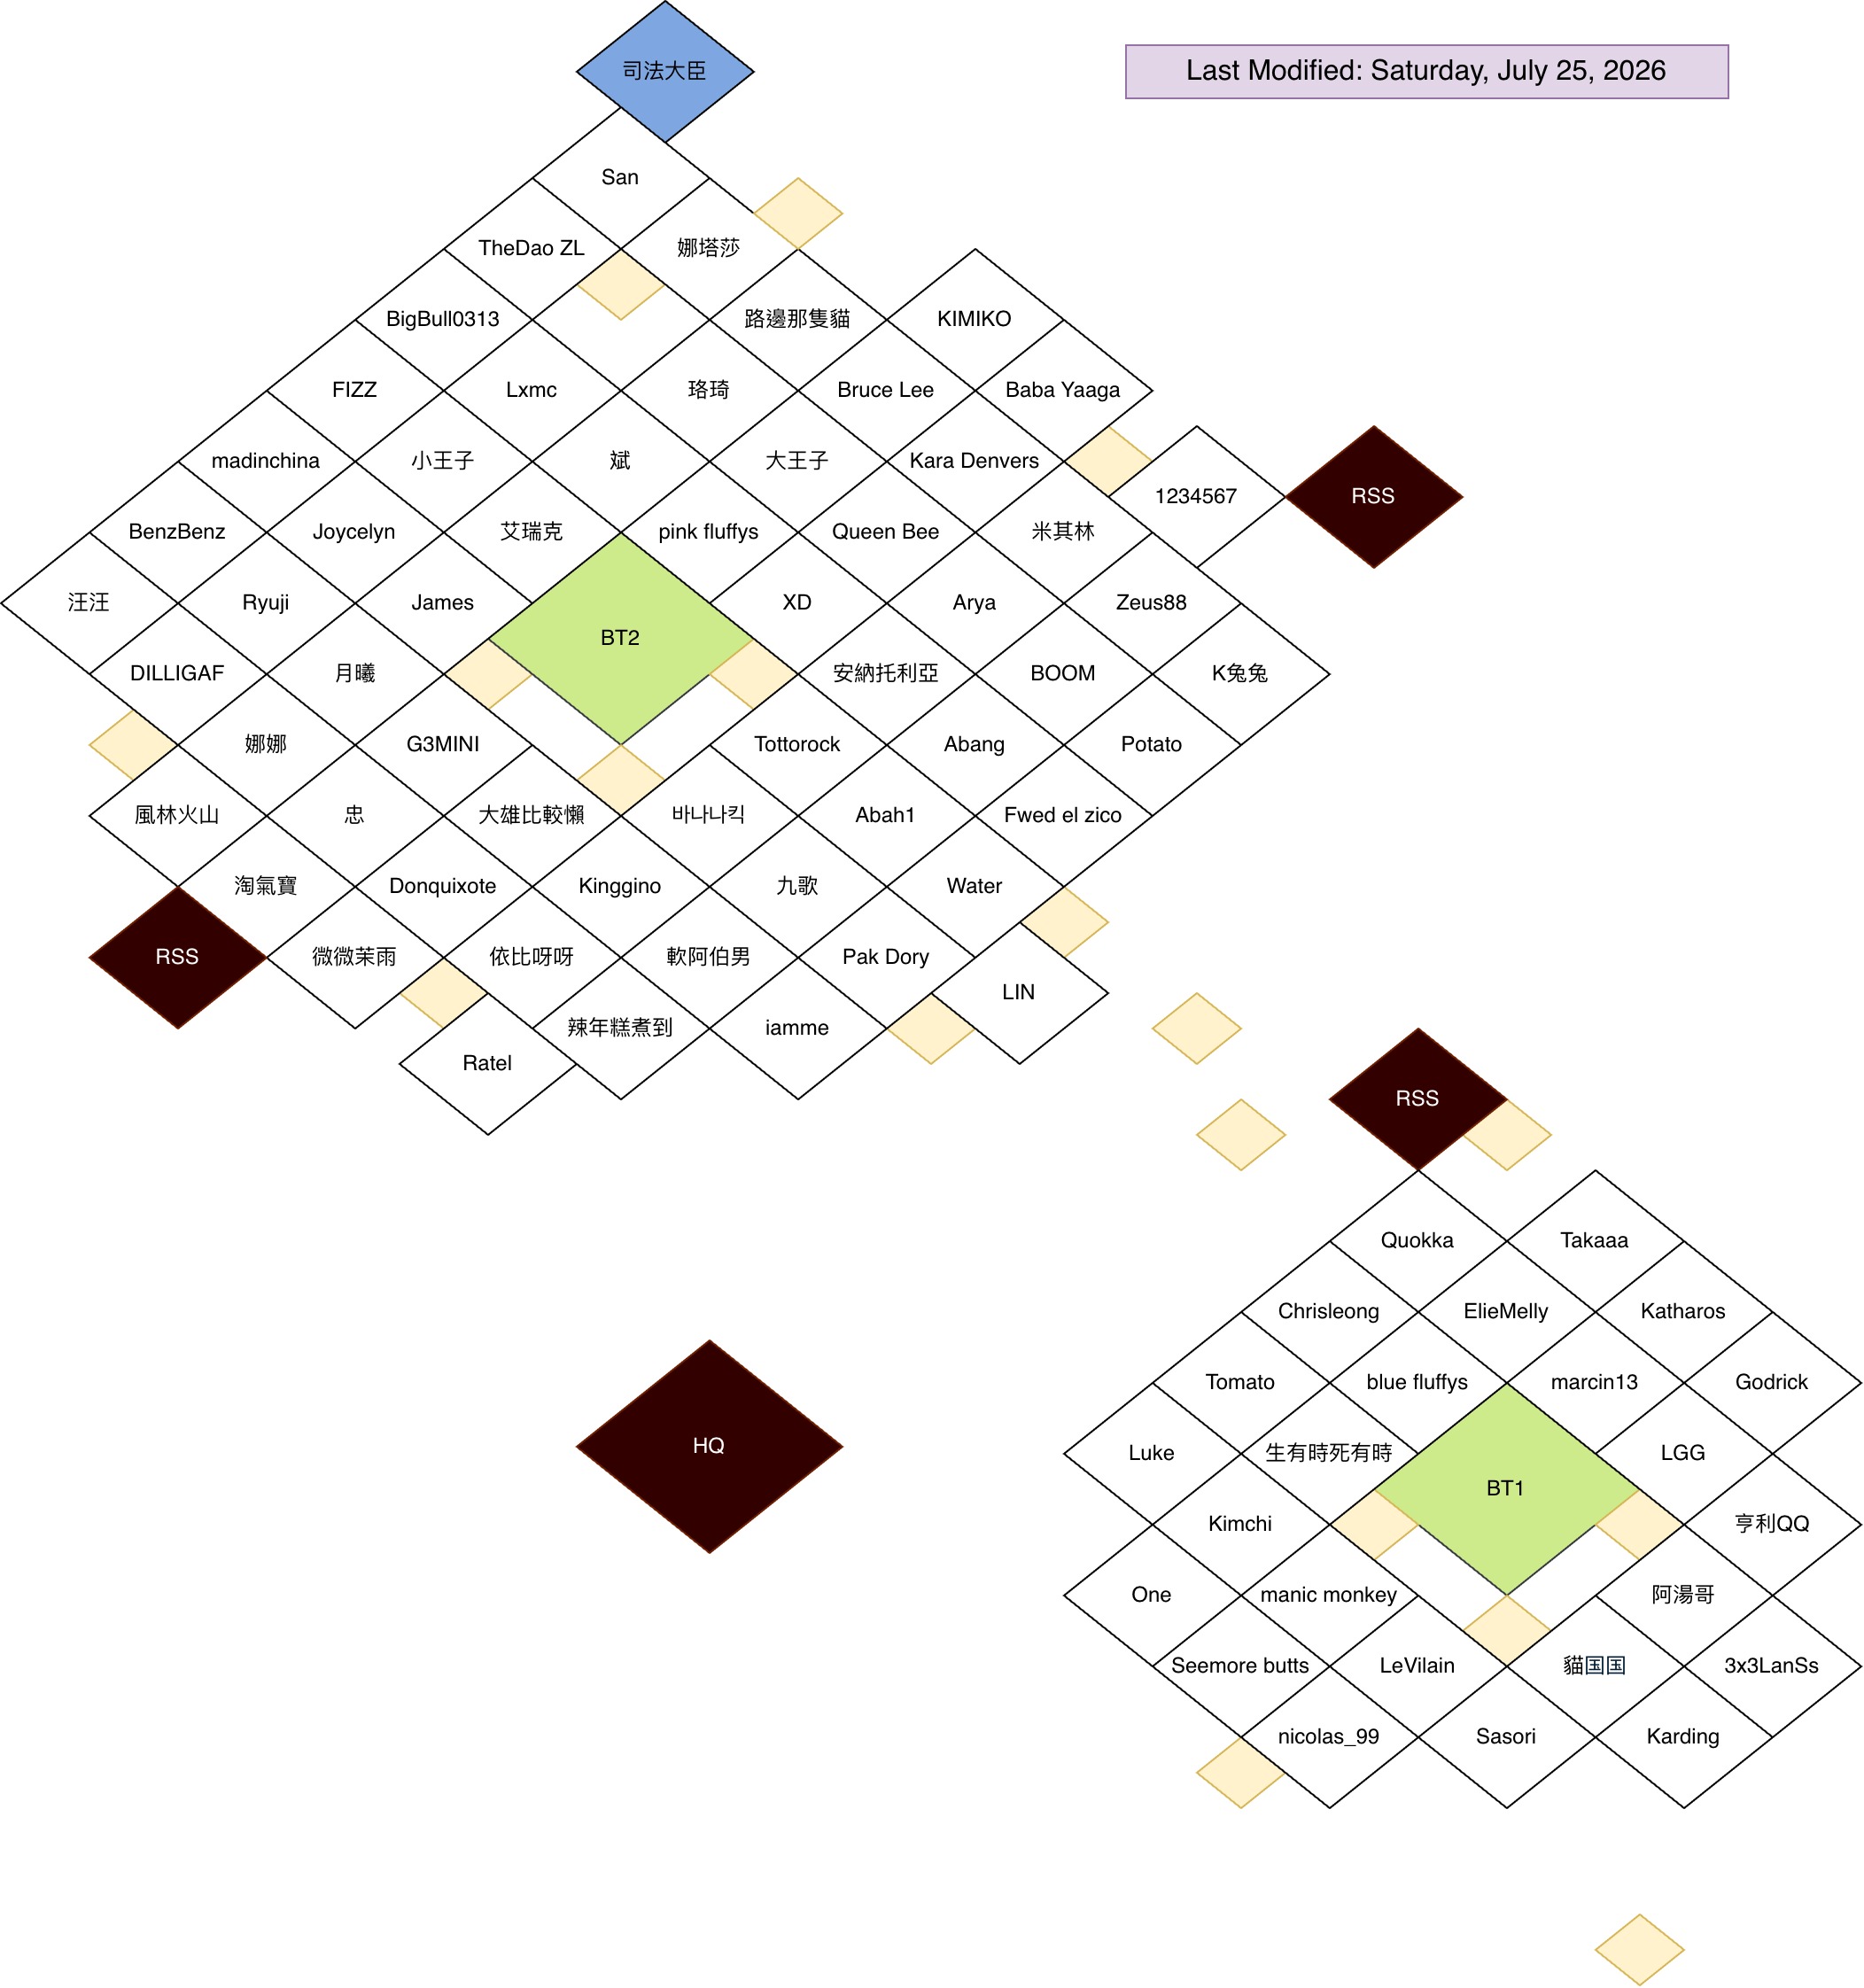
🔍 點擊地圖可放大檢視
KvK 5 Days Prep Guide
Cesares Captain Rules
VIKINGS Rules
Mystic Trial
Season 4
•
Phase 6/8
遺跡

1. FnS
2. WTC
3. FnS
4. WTC
5. TnE
6. TnE
7.
8. TnE
9. FnS
10. CAT
11. CAT
12. WTC
要塞
1. TnE
2. FnS
3. WTC
4. TnE
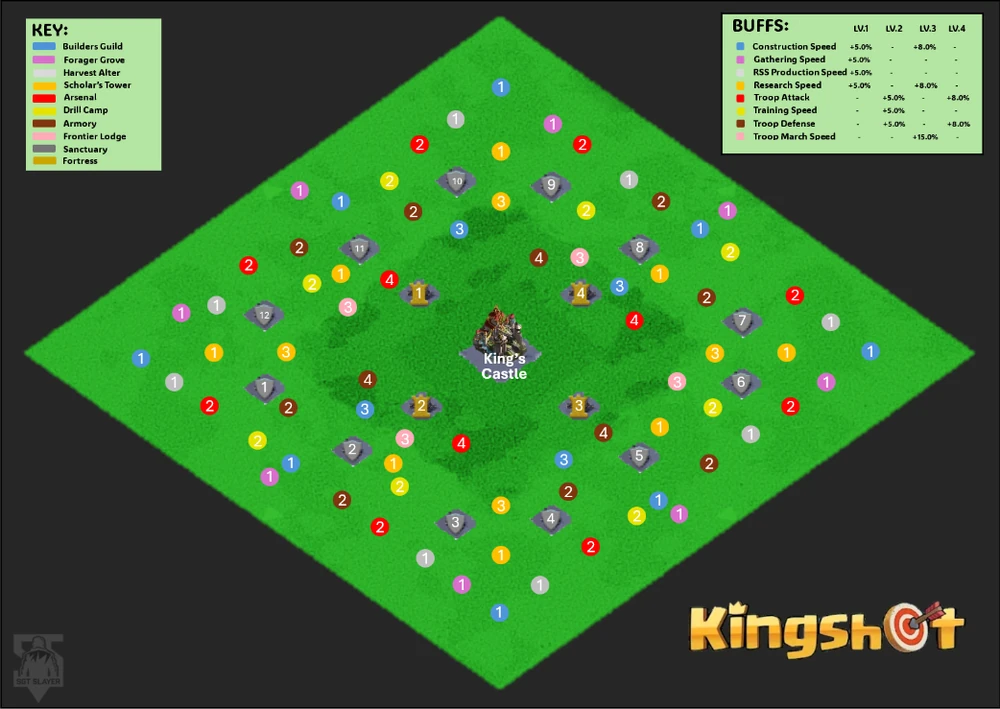
Kingdom buildings
伺服器時程
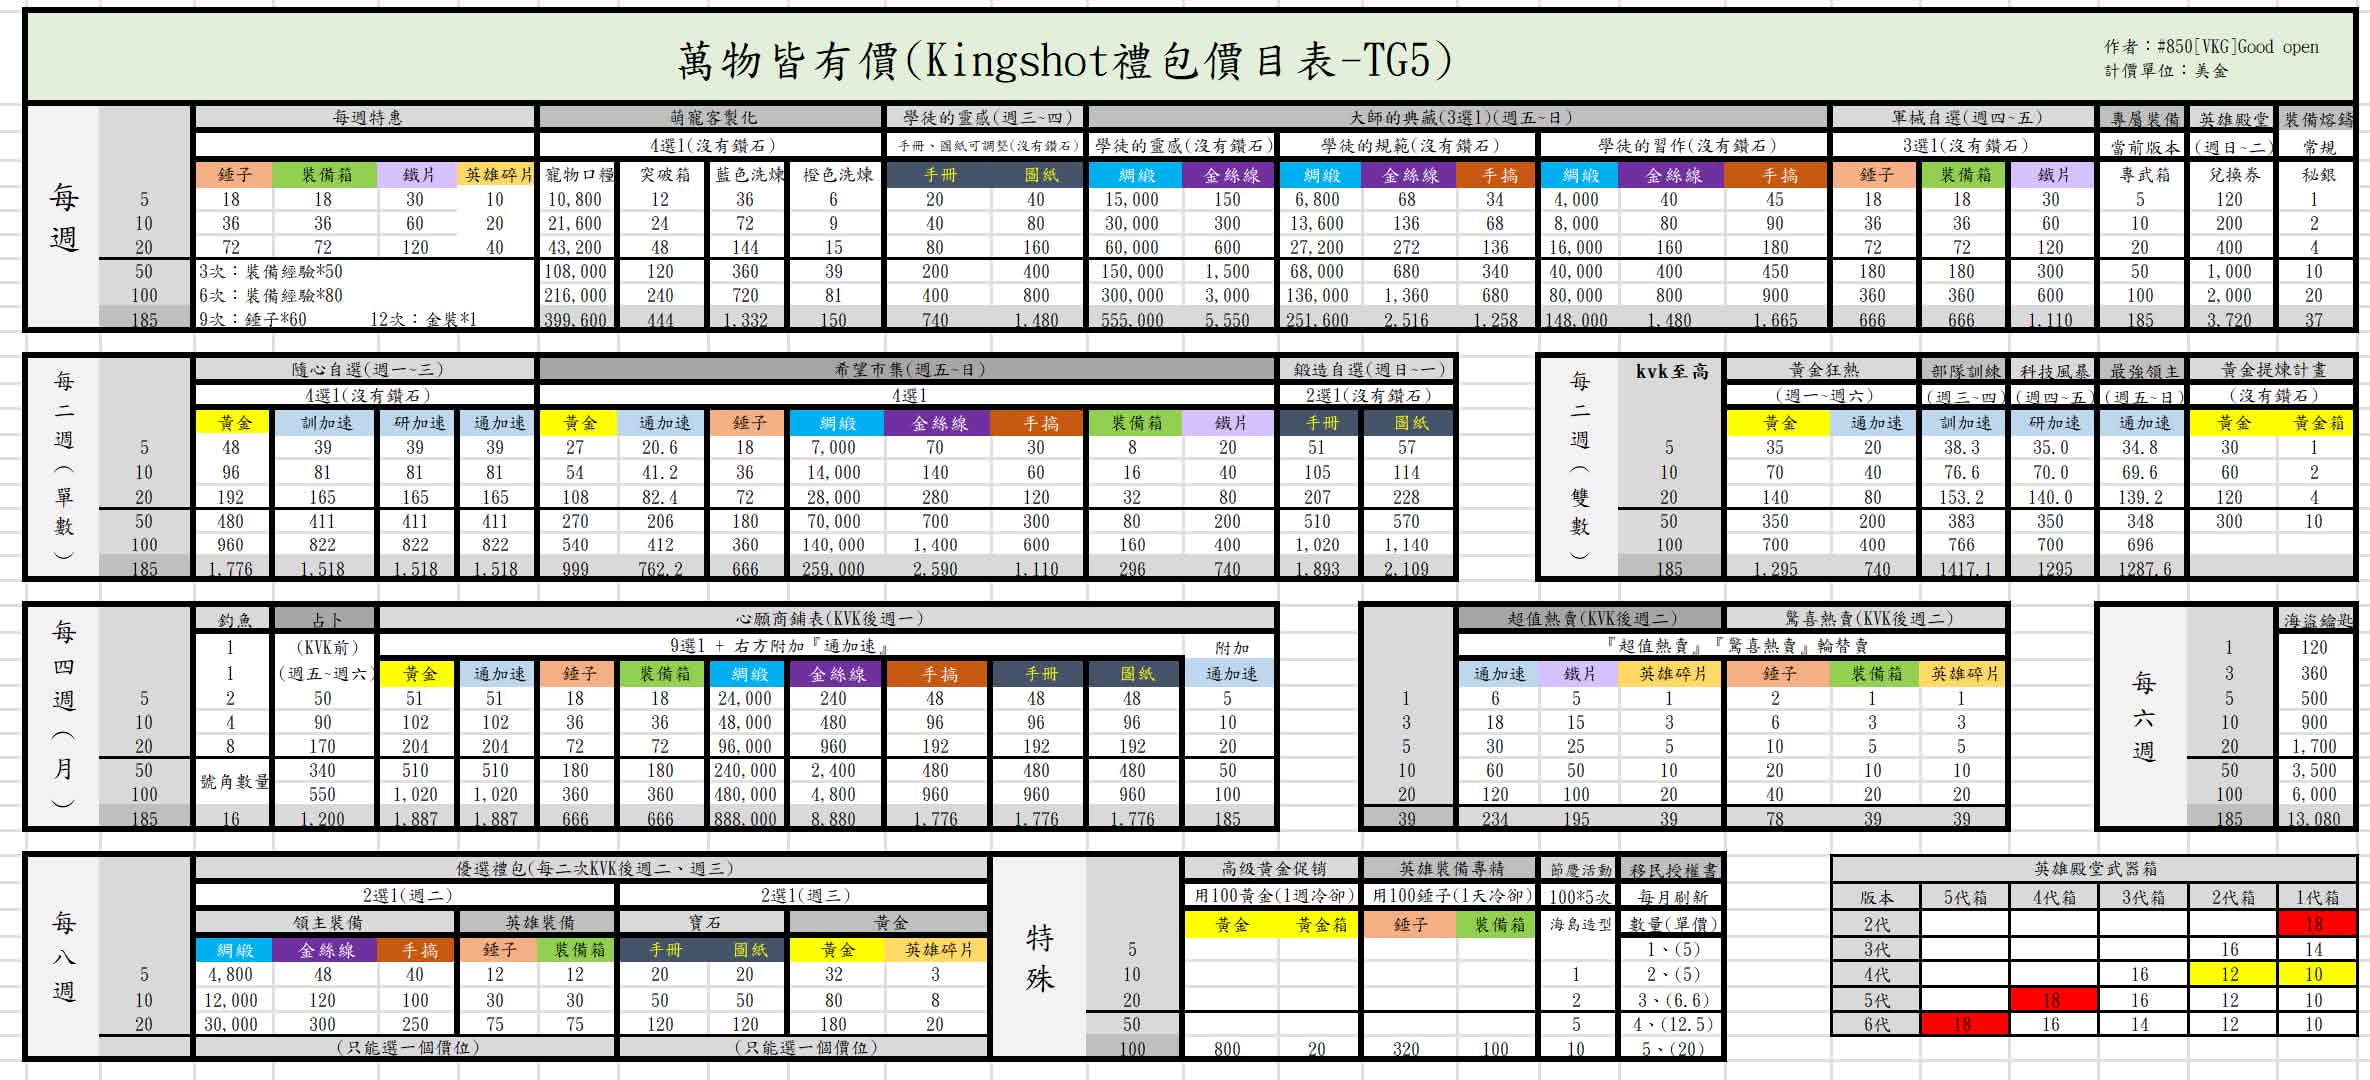
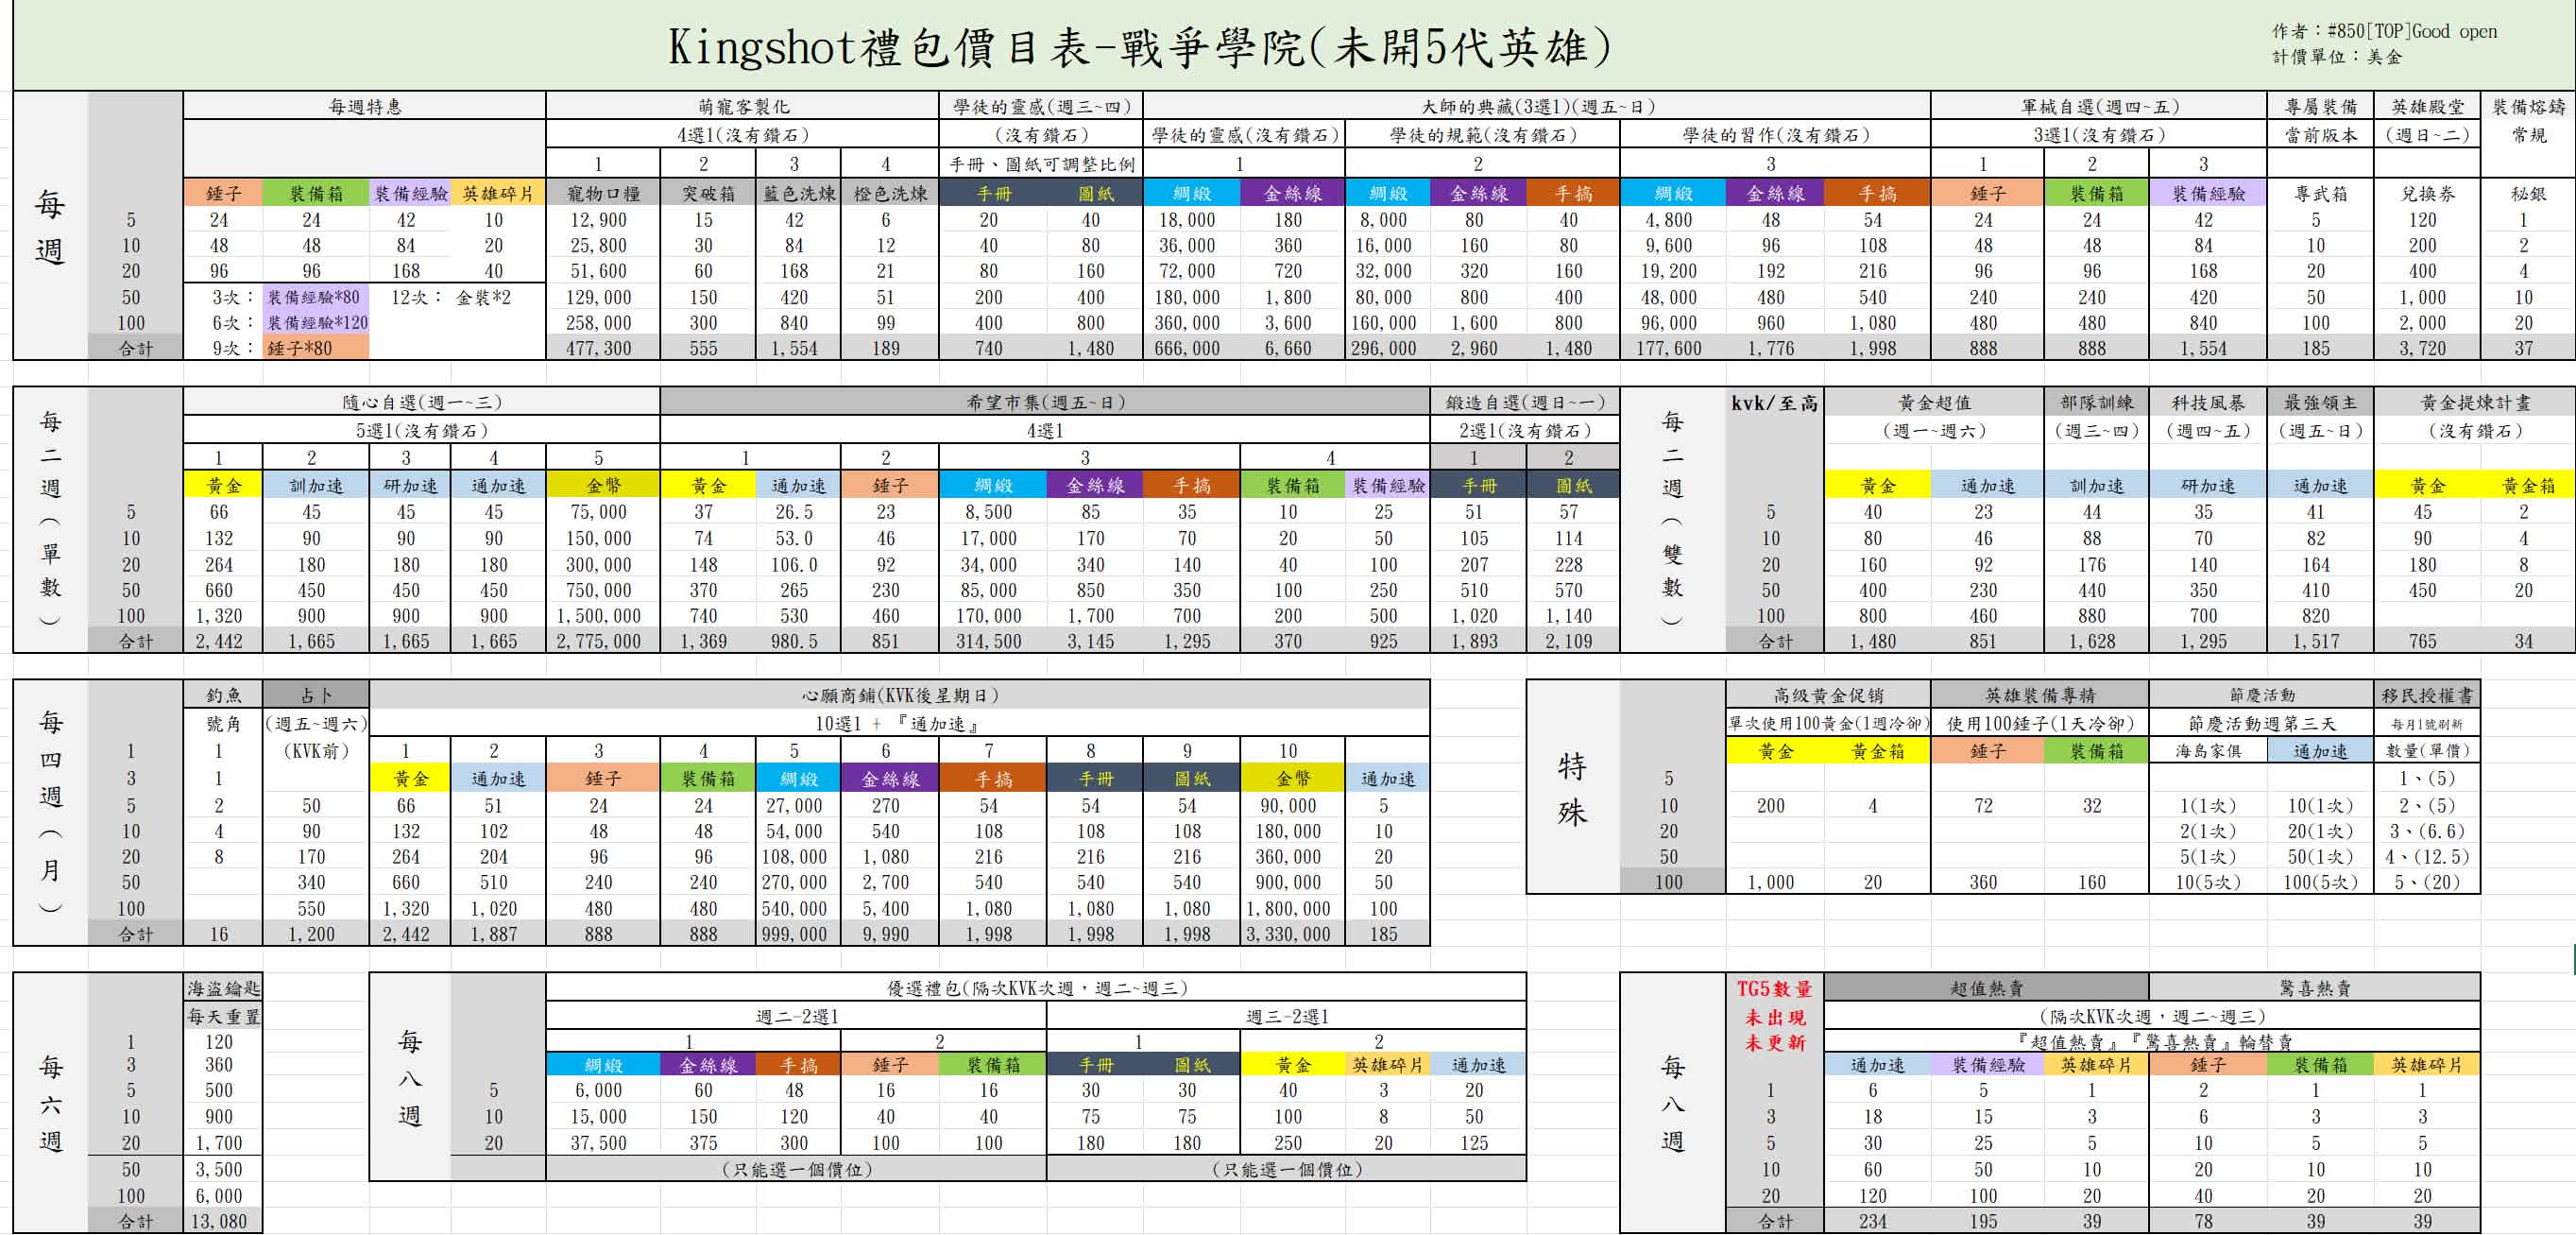
禮包計算機
禮包資訊
請選擇禮包價格並將包含的物品加入清單
NT$ 170
(等效  2,500)
▼
2,500)
▼
NT$ 33
(等效 500)
NT$ 170
(等效 2,500)
NT$ 330
(等效 5,000)
NT$ 670
(等效 10,000)
NT$ 1,690
(等效 25,000)
NT$ 3,290
(等效 50,000)
請選擇物品...
▼
領主裝備與寶石
英雄裝備
加速
資源
禮包內含物品
共 0 項物品
清單為空,請從上方選擇物品加入
計算結果
禮包性價比與價值比較
總等效鑽石
真實禮包價值
0.0%
💡
請在左側加入物品開始計算。
價格與鑽石基準價值對照
NT$ =
NT$ 33
500 鑽石
NT$ 170
2,500 鑽石
NT$ 330
5,000 鑽石
NT$ 670
10,000 鑽石
NT$ 1,690
25,000 鑽石
NT$ 3,290
50,000 鑽石
禮包資訊
TG5 還沒有戰爭學院
TG5戰爭學院 - S5英雄開放前
×
![]()